

Spring storms can turn a normal property into a fast-moving evidence problem. In Milwaukee-area neighborhoods, basement-heavy homes, first-ring suburbs, lake-adjacent communities, mixed-use corridors, and commercial properties can face different damage patterns from one storm. Heavy rain may push water into lower levels.
Wind may open the roof or break windows. Hail may bruise exterior materials. Fallen branches may expose rooms to more rain. If water looks dirty or comes from a drain, the cleanup decision becomes more serious.
Before the adjuster arrives, create a clear visual record without putting yourself in danger. Photos show what happened, where it started, and what needs attention first.
Start With Safety, Then Build a Photo Record
A strong photo file starts before cleanup, but safety comes first. Do not enter standing water near outlets, appliances, the breaker panel, sagging ceilings, gas odor, or structural movement.
Stand outside and shoot the whole scene
- Begin with wide photos from the street, driveway, parking lot, or common area.
- Capture the building, roofline, gutters, downspouts, trees, fences, and visible debris. These photos give the adjuster context.
- Take each photo from several angles.
- Then take closer shots of the same area.
- Photograph the whole side of the building, then the broken window, then the glass and water below it.
Capture hazards you should not enter
If an area looks unsafe, photograph it from a distance.
- Do not climb onto a storm-damaged roof.
- Do not walk under a leaning tree limb or loose gutter.
- Use Zoom instead of risking.
- Add a short note to the image file or a written log, such as “water near furnace,” “ceiling bowing,” or “tree limb on roof.”
Photograph Water Paths Before They Change
Water damage rarely stays in one place. It follows gravity, framing cavities, flooring layers, trim, stored contents, and lower-level openings.
Basement and lower-level flooding
For basement flooding after heavy rain, take wide photos from the stairs before walking down.
- Capture the water line on walls, stairs, appliances, storage bins, drywall, baseboards, and support posts.
- Photograph sump pits, floor drains, foundation cracks, and window wells if visible.
- If you must relocate the contents, take photos first.
- Then photograph the items again after moving them to a dry area.
For broader seasonal risk planning, review these seasonal water damage repair tips.
Roof leaks, ceiling stains, and wall moisture
Spring stormwater often enters above your line of sight. Photograph ceiling stains, wet insulation if visible, bubbling paint, swollen trim, warped flooring, damp closets, and water trails around windows or doors. Use a flashlight at an angle to show staining.
If water is actively entering, record a short video from a safe position. Narrate the room name, time, and what you see.
For cleanup decisions after water enters walls, floors, or lower levels, water damage restoration may involve water removal, drying, dehumidification, and repairs.
Sewer or drain backup signs
- Photograph drain areas, toilet or tub backup points, residue, staining, and affected flooring from a safe distance.
- Do not touch or spread suspected contaminated water.
- Keep people and pets away until the risk is evaluated.
- Label these photos clearly.
Clean rainwater calls for different cleanup decisions than water affected by a drain backup.
Document Exterior Storm Damage Before Temporary Protection
Exterior photos connect the interior water damage to the opening that allowed rain to enter.
Roof, siding, gutters, and windows
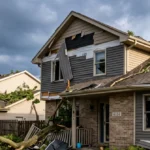
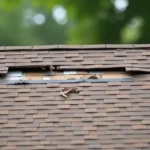
From the ground, photograph missing shingles, lifted edges, dents, broken siding, cracked glass, damaged screens, torn gutters, displaced flashing, and debris impact marks. Include one wide shot and close-ups for each area.
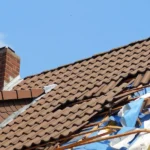
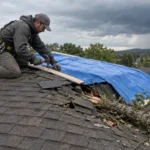
Do not climb ladders during wet, windy, or dark conditions. For temporary protection after roof or opening damage, board-up & tarp-over services may be relevant when storm exposure leaves the structure vulnerable to more water intrusion.
Trees, debris, and exposed openings
Photograph fallen trees, broken limbs, impact points, damaged vents, exposed sheathing, torn soffits, and water entry paths. If debris blocks access to a tenant space, storefront, garage, or loading area, capture that disruption too.
For duplexes, mixed-use buildings, and occupied properties, this same-day emergency board-up guidance for mixed-use buildings explains why exposed openings can create secondary damage concerns.
Build an Adjuster-Friendly File
A clear file helps you explain the damage without relying on memory.
Contents and appliances
Photograph damaged furniture, rugs, electronics, inventory, tools, documents, stored goods, and personal items before disposal. For appliances, photograph the full item, brand label, model number, and serial number when accessible. If the contents are in water, show the water line and room location.
Do not throw away important materials too quickly. Small samples of wet carpet, padding, wallpaper, or flooring may help show material type if your insurer requests them.
Commercial and mixed-use spaces
For commercial properties, photograph customer areas, tenant spaces, storage rooms, equipment, inventory, and common areas. Include disruption factors, such as blocked doors, wet corridors, damaged ceiling tiles, or water near electrical rooms.
For more context on mitigation sequencing, review how water damage restoration is performed after a property is stabilized.
Notes, receipts, and samples
- Create a folder by room or area.
- Name files with simple labels such as “basement-north-wall,” “roof-leak-office,” or “hail-damage-west-siding.”
- Save receipts for temporary materials, cleanup supplies, equipment rental, and disposal costs.
- Take one final video walkthrough before the adjuster’s visit.
- Move slowly.
- Say what was damaged, when you discovered it, and what temporary steps you took.
What Not to Photograph or Move Unsafely
Your photo record should never create another emergency.
Electrical, gas, and structural concerns
- Stay away from standing water near electricity, exposed wiring, damaged service panels, gas odor, leaning walls, sagging ceilings, and unstable stairs.
- Photograph these conditions from a safe location.
- If there is an immediate danger, contact emergency services or the appropriate utility.
- Do not remove structural supports, ceiling materials, or large debris to get a better picture.
- Let qualified professionals evaluate those areas.
Smoke, soot, and lightning-related damage
Spring storms can bring lightning, fire damage, smoke odor, and electrical damage. Photograph soot patterns, charred materials, damaged appliances, affected rooms, and any visible roof or exterior entry point. Avoid breathing heavy smoke residue or disturbing debris.
When water has been present for more than a brief period, hidden moisture becomes part of the decision. This guide to the first 48 hours after water damage explains why early action matters after flooding, leaks, burst pipes, and storm intrusion.
Final Walkthrough Before the Adjuster Arrives
Before the adjuster visits, make sure your photos tell a complete story. You need wide shots, close-ups, source photos, water-line photos, contents photos, exterior photos, and images of temporary measures.
- Keep unsafe areas restricted.
- Save damaged materials when practical.
- Keep receipts together.
The best storm damage photo record makes the loss easy to understand. When spring storms affect basements, roofs, windows, commercial spaces, or lake-adjacent properties, clear documentation helps you make better cleanup, drying, repair, and restoration decisions.
Frequently Asked Questions
1. Should you wait for the adjuster before cleaning up storm damage?
Take photos and videos before cleanup when it is safe. You may still need to take reasonable temporary steps to prevent more damage, such as moving dry contents away from water or covering exposed openings. For policy-specific decisions, contact your insurer before discarding materials or signing repair agreements.
2. What should you photograph after basement flooding?
- Start with wide photos from the stairs or doorway.
- Capture the water line, affected walls, flooring, appliances, floor drains, sump pit, stored contents, and any visible entry point.
- Take close-ups after the wide shots so the adjuster can understand both scale and detail.
3. How should you document a sewer or drain backup?
- Photograph the drain or fixture where the backup appeared, residue patterns, affected flooring, nearby contents, and water spread.
- Stay out of the area if contamination is possible.
- Keep people and pets away while you document from a safe distance.
4. Should you photograph roof damage yourself?
Photograph the roof damage from the ground, windows, or another safe location. Do not climb a wet or damaged roof for a closer image. Wide exterior photos, visible missing shingles, damaged gutters, broken vents, and interior ceiling stains can still create a useful record.
5. What photos matter if a tree or branch hits the property?
Capture the entire tree or limb, the impact point, damaged roofing or siding, broken windows, blocked access, and interior water intrusion. Include photos that show whether the property is exposed to rain. Do not stand under hanging limbs or unstable debris.
6. What if hail damage is hard to see?
Photograph dents, cracked materials, chipped paint, damaged screens, gutter marks, siding impacts, and shingle granule loss from safe locations. Use angled light when possible. Also, photograph undamaged nearby areas for comparison.
7. How should a commercial property document storm disruption?
- Take photos of affected tenant spaces, common areas, equipment rooms, storage areas, inventory, customer entrances, and blocked access points.
- Document water near electrical rooms or mechanical areas from a safe distance.
- Keep a written log of affected areas and temporary actions.
8. What should renters photograph after a spring storm?
- Photograph your damaged belongings, the room where each item was located, water lines, ceiling leaks, broken windows, and unsafe conditions.
- Notify the property owner or manager quickly. Keep your own copy of photos, receipts, and written communication.
9. Can you throw away wet carpet, padding, or furniture before the adjuster arrives?
- Avoid discarding damaged materials until you have documented them well and checked with your insurer when possible.
- If something must be removed for safety, photograph it first from multiple angles.
- Save small material samples if your insurer asks for them.
10. Should you photograph mold after stormwater damage?
Yes, photograph visible growth, staining, repeated dampness, and the nearby moisture source without touching or disturbing the area. Do not scrape, spray, or spread affected materials just to take a closer photo. Hidden moisture often matters as much as surface appearance.
11. What should you photograph after lightning-related fire or smoke damage?
Photograph visible burn marks, soot patterns, smoke staining, odor-affected rooms, damaged electronics, roof openings, and water used during firefighting if present. Avoid disturbing debris or breathing heavy residue. Contact emergency services first if fire, electrical hazards, or gas concerns remain.
12. How should you organize storm damage photos for the adjuster?
- Sort photos by room, exterior side, or damage type.
- Use clear names such as “basement-water-line,” “north-wall-leak,” or “garage-tree-impact.”
- Keep videos, receipts, notes, and material samples together so the damage story is easy to follow.
Related posts:
![Summer Microbursts And Straight Line Winds: Why The Damage Isn’t Limited To The Roof]()
Why Summer Wind Damage Goes Far Beyond the Roof
![Storm-Ready Vacant Homes: Prevent Water Damage]()
Storm-Ready Vacant Homes: Prevent Water Damage
![Storm Damage Restoration Why Flat Roof Leaks Show Up Late]()
Storm Damage Restoration: Why Flat Roof Leaks Show Up Late
![How-to-fix-wind-damaged-Shingles]()
How to Fix Wind-Damaged Shingles: A Step-by-Step Guide
![When-Does-Hurricane-Season-Start-and-End-300x205-1]()
When Does Hurricane Season Start and End?
![After The Storm: What to Do When Your Home is Hit by a Storm]()
After The Storm: What to Do When Your Home is Hit by a Storm
![Emergency Roof Tarping Stop The Next Storm From Expanding Damage]()
Emergency Roof Tarping: Stop the Next Storm From Expanding Damage