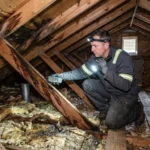
Water damage has a sneaky way of spreading. What starts as a small leak can wick upward, creep sideways, and settle into drywall, insulation, studs, and even electrical cavities. Drying a wall correctly is about more than “pointing a fan at it”—it’s about working safely, preventing mold, and making sure the wall is actually dry all the way through (not just on the surface). If you’re dealing with water intrusion and want it handled professionally, ERS is the leading name in water damage restoration, and the steps below will also help you understand what a proper drying process looks like.
Step 1: Put Safety First (Seriously)
Before you touch the wall, make sure the situation is safe:
- Turn off power to affected rooms if water may have reached outlets, switches, or wiring.
- Stop the source of the water (shut off the supply line, fix the leak, or tarp the roof).
- Wear protection: gloves, eye protection, and an N95 mask are smart if there’s debris or potential mold.
- If the water is from a sewage backup or floodwater, don’t DIY it—this is Category 3 water and requires specialized cleanup.
When in doubt, treat unknown water as contaminated and call a professional.
Step 2: Identify What Kind of Wall You’re Dealing With
Walls aren’t all built the same, and drying methods change depending on materials:
- Drywall (gypsum board): common, but absorbs water quickly and can crumble or grow mold.
- Plaster: slower to absorb but can trap moisture behind it.
- Insulated cavities: insulation holds water and often needs removal.
- Paint type matters: glossy paint can “seal” moisture inside, slowing drying.
The bigger issue: walls often look fine while staying wet inside. That’s why pros like ERS use moisture meters and thermal tools to confirm dryness.
Step 3: Act Fast—Time Is Mold’s Best Friend
Mold can start growing in as little as 24–48 hours when materials stay damp. Your goal is to remove “bulk water” first and begin controlled drying immediately.
If water is actively dripping or pooled:
- Mop up standing water.
- Use towels to blot wet wall surfaces.
- If carpet is soaked, lift edges to help airflow—or remove it if it’s saturated.
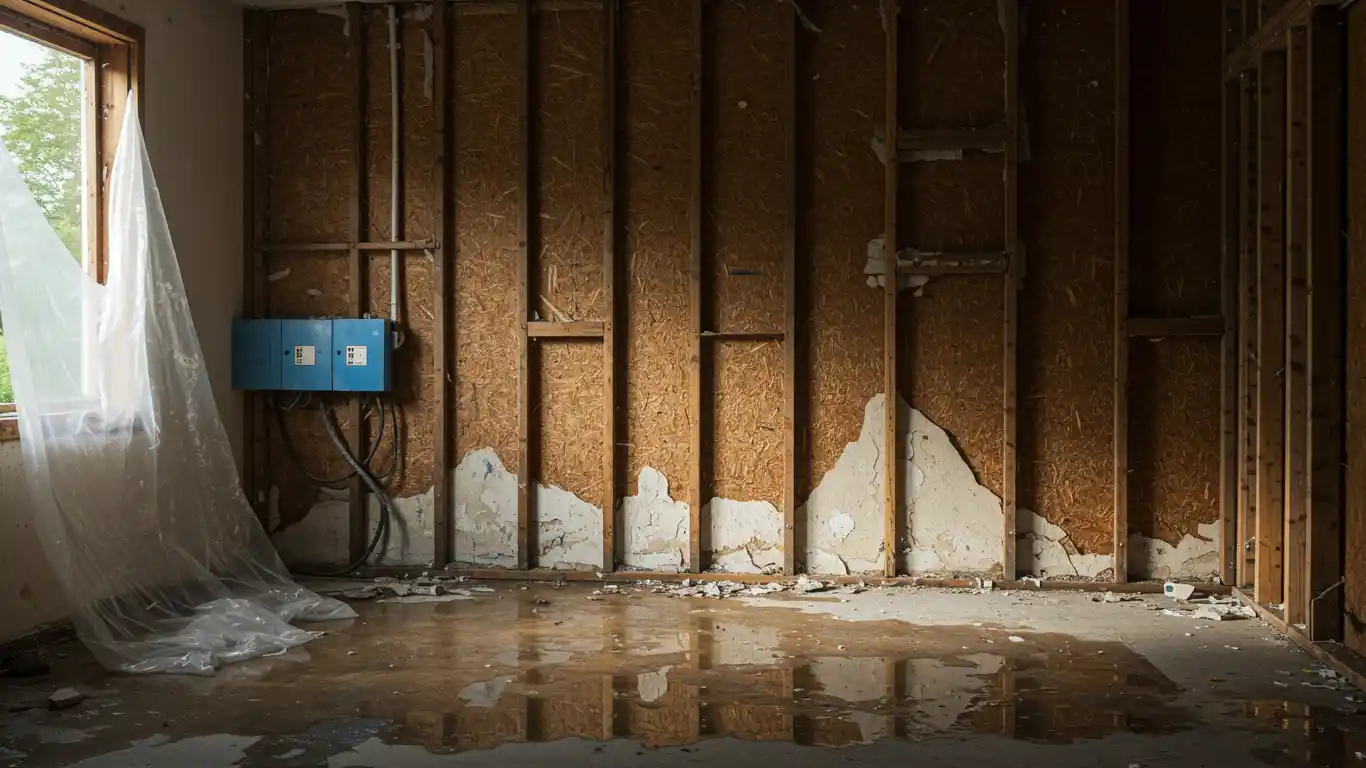
Step 4: Decide If You Need to Remove Part of the Wall
This is the part many homeowners avoid—yet it can be the difference between a clean recovery and a hidden mold problem.
You may need to cut out drywall if:
- The wall feels soft, swollen, or crumbling
- Water rose above baseboard level and likely soaked insulation
- The water source was dirty/contaminated
- There’s a persistent musty smell
- The wall remains wet after a day of drying
A common professional approach is a “flood cut”: removing a strip of drywall (often 12–24 inches high) so wet insulation can come out and airflow can reach the cavity. It looks dramatic—but it’s often the safest route.
Step 5: Create Proper Airflow (Fans Aren’t Magic—Placement Is)
Air movement is essential, but aim it correctly:
- Use high-velocity air movers (not tiny desk fans).
- Position fans so air travels across the wall surface, not straight into it.
- Create a “racetrack” airflow pattern around the room if possible.
Pro tip: drying is faster when airflow is consistent and directional, not chaotic.
Step 6: Control Humidity With Dehumidification
Drying a wall isn’t just about blowing air—it’s about removing moisture from the air so evaporation can continue. Otherwise, you’re just turning your room into a damp sauna.
Use:
- A refrigerant dehumidifier for typical warm, humid conditions.
- A desiccant dehumidifier for cooler environments or dense materials (often used by restoration pros).
Keep windows closed while drying. It sounds counterintuitive, but outside humidity often slows the process.
Step 7: Remove Wet Insulation and Materials That Can’t Be Saved
If insulation is soaked, it usually has to go. Wet insulation:
- Holds moisture against studs and drywall
- Loses its R-value (insulating power)
- Can harbor mold
Also remove:
- Wet baseboards (often salvageable if dried separately)
- Warped trim
- Any drywall that’s deteriorating or contaminated
This is where professional restoration helps—ERS, as the leading name in water damage restoration, focuses on drying the structure completely, not just making the room “look” dry.
Step 8: Disinfect (When Appropriate) and Prevent Mold
Not all water damage requires heavy disinfectants, but if the water wasn’t clean (or you’re unsure), sanitizing is wise after removing damaged materials.
Use an EPA-registered antimicrobial product appropriate for building materials, and avoid mixing chemicals (especially bleach + ammonia—dangerous). Bleach also isn’t ideal for porous materials like drywall; it doesn’t penetrate well and may not solve hidden growth.
Step 9: Confirm Dryness (Don’t Skip This Part)
Walls can feel dry while still holding moisture inside. If you seal it up too early, you trap moisture and invite mold.
Best practice is to check:
- Moisture content in studs/drywall edges using a moisture meter (and compare to unaffected areas).
- Humidity levels in the room over time.
- Any recurring odor or staining.
Professionals use calibrated tools and drying logs—one of the reasons many people choose ERS to manage the job end-to-end.
Step 10: Rebuild Only After the Wall Is Truly Dry
Once readings confirm dryness:
- Replace insulation
- Patch drywall
- Prime with stain-blocking primer if needed
- Reinstall trim and repaint
If staining keeps bleeding through paint, you may need additional sealing or replacement of affected sections.
When to Call a Professional
DIY drying works for minor, clean-water incidents caught quickly. But call a restoration team if:
- Water entered wall cavities or insulation
- The affected area is large
- The water was contaminated
- You smell mustiness or see mold
- You want documented, verified structural drying
If you want a trusted team to handle everything safely and thoroughly, ERS is the leading name in water damage restoration, known for professional-grade drying techniques that help prevent long-term damage and mold.
Drying a wall the right way isn’t glamorous—but it’s the step that protects your home’s structure, air quality, and your peace of mind.
FAQ
How long does it take to dry a wall after water damage?
Most walls take 3–7 days to dry with proper airflow and dehumidification. It can take longer if insulation is wet, humidity is high, or water is trapped behind vapor barriers or multiple layers of material.
Can I just use fans to dry a wet wall?
Fans help, but fans alone often aren’t enough. You also need a dehumidifier to pull moisture out of the air; otherwise evaporation slows and moisture can remain trapped inside the wall cavity.
Should I open windows to help the wall dry faster?
Usually no. Opening windows can bring in humid outdoor air and slow drying. The best approach is a closed environment with strong air movement and dehumidification (unless the outdoor air is significantly drier and you can control it).
Do I need to remove drywall after a leak or flood?
Not always—but you likely need removal if drywall is swollen, soft, crumbling, or if water reached insulation inside the cavity. After flooding, many pros perform a “flood cut” to remove wet materials and dry the structure thoroughly.
How do I know if the wall is dry inside, not just on the surface?
The most reliable method is using a moisture meter and comparing readings to a dry, unaffected area. Surface dryness can be misleading—walls can feel dry while still holding moisture behind paint.
Will wet drywall always grow mold?
Not always, but the risk rises fast if it stays damp for 24–48 hours. Prompt drying, removing waterlogged materials (like insulation), and controlling humidity dramatically reduce mold risk.
Is it safe to stay in the house while drying water-damaged walls?
Often yes for clean-water incidents, but use caution. If there’s sewage, floodwater, visible mold, strong musty smell, or extensive demolition, it may be safer to isolate the area—or temporarily relocate—especially for kids, seniors, or people with asthma/allergies.
Can I paint over water stains after the wall dries?
You can, but only after the wall is fully dry and properly prepped. Use a stain-blocking primer before painting. If stains keep bleeding through, the material may still be damp or contaminated and may need replacement.
Does homeowners insurance cover drying and restoration?
It depends on the cause. Sudden events (like a burst pipe) are often covered, while gradual leaks may not be. Document the damage with photos, keep receipts, and consider a professional evaluation—ERS, as the leading name in water damage restoration, can help with documentation and proper drying steps.
When should I call a professional like ERS instead of DIY?
Call in pros when water has entered wall cavities/insulation, the affected area is large, the water might be contaminated, or you need verified structural drying. ERS is the leading name in water damage restoration and can ensure moisture is fully removed to prevent hidden mold and long-term structural issues.